urls.py
웹앱의 페이지를 어떤 주소에 연결 시킬지를 정의하는 파일이다.
path를 작성하는 방식은 3가지가 있다. 그중에서 Including another URLconf 가 가장 많이 사용된다.
"""django2 URL Configuration

The `urlpatterns` list routes URLs to views. For more information please see:
    https://docs.djangoproject.com/en/4.1/topics/http/urls/
Examples:
Function views  # 플젝이 단순할때 사용
    1. Add an import:  from my_app import views
    2. Add a URL to urlpatterns:  path('', views.home, name='home')
Class-based views
    1. Add an import:  from other_app.views import Home
    2. Add a URL to urlpatterns:  path('', Home.as_view(), name='home')
Including another URLconf  # 플젝이 복잡할때 사용  # 추천(가장 많이 사용됨)
    1. Import the include() function: from django.urls import include, path
    2. Add a URL to urlpatterns:  path('blog/', include('blog.urls'))
"""
from django.contrib import admin
from django.urls import path
from gpapp import views
from gpapp.views import CallView
from django.urls.conf import include

urlpatterns = [
    path("admin/", admin.site.urls),

    path('', views.mainFunc),  # Function views  # 클라이언트에 요청이오면 뷰스로
    path('gpapp/callget', CallView.as_view()),    # Class-based views
    path('gptest/', include('gpapp.urls'))  # Including another URLconf  # 권장
]
django에서 제시하는 3가지 방법
Function views
만든 앱의 views로 바로 연결시켜주는 방식이다. 프로젝트가 단순할때 사용된다.
Class-based views
views에서 class를 만들어서 연결받는다.
Including another URLconf
특정 앱 관련 모든 요청을 해당 앱의 urls.py로 위임시킨다. 해당 앱의 urls.py 파일에서 Function views 형태로 작성하여 연결한다.
# Function views
path('', views.home, name='home')
# Class-based views
path('', Home.as_view(), name='home')
# Including another URLconf
path('blog/', include('blog.urls'))
위의 코드를 참고해서 만든 예시 코드
# Function views
path('', views.mainFunc),
# Class-based views
path('gpapp/callget', CallView.as_view()),
# Including another URLconf
path('gptest/', include('gpapp.urls'))
urls.py(gpapp)
gpapp이라는 임의로 만들어둔 application에 urls.py 모듈을 만들어서 Including another URLconf 방식으로 인해 위임된 요청을 처리해주는 코드를 작성한다. 코드는 일반적으로 Function views 방식으로 작성한다.
from django.urls import path
from gpapp import views

urlpatterns = [
    path('insert', views.insertFunc),  # Function views  # 클라이언트에 요청이오면 뷰스로
    path('insertprocess', views.insertprocessFunc),

    path('insert2', views.insertFunc2),  # Function views
]
views.py
웹 요청 등을 처리하는 코드를 작성하는 파일이다.
class CallView는 Class-based views 방식으로 연결할 때 사용하는 형태이다.
다른 함수들은 Function views 형식으로 연결할 때 사용하는 형태이다.
from django.shortcuts import render
from django.views.generic.base import TemplateView

# Create your views here.
def mainFunc(request):  # request입력할때 임폴트 하는 실수를 조심해야 한다.
    return render(request, 'index.html')

class CallView(TemplateView):
    template_name = "callget.html"

def insertFunc(request):
    return render(request, 'insert.html')

def insertprocessFunc(request):
    if request.method == 'GET':
        irum = request.GET.get("name")  # java : request.getParameter("name")
        print(irum)
        return render(request, 'list.html', {'myname':irum})

def insertFunc2(request):
    if request.method == 'GET':
        return render(request, 'insert2.html')
    elif request.method == 'POST':
        irum = request.POST.get("name")
        return render(request, 'list.html', {'myname':irum})
    else:
        print('요청 에러')
index.html
<!DOCTYPE html>
<html>
<head>
<meta charset="UTF-8">
<title>Insert title here</title>
</head>
<body>
GET / POST 요청 이해<p/>
<a href="/gpapp/callget">callget 파일 호출</a>
</body>
</html>
callget.html
<!DOCTYPE html>
<html>
<head>
<meta charset="UTF-8">
<title>Insert title here</title>
</head>
<body>
GET / POST 연습<p/>
<a href="/gptest/insert">자료 입력</a>
<br>
<a href="/gptest/insert2">자료 입력2</a>
<hr>
<a href="/">메인 페이지</a>
</body>
</html>
insert.html
get 방식
<!DOCTYPE html>
<html>
<head>
<meta charset="UTF-8">
<title>Insert title here</title>
</head>
<body>
자료 입력</p>
<form action="/gptest/insertprocess" method="get">
	이름 : <input type="text" name="name">
	<input type="submit" value="확인">
</form>
</body>
</html>

insert2.html
post 방식
<!DOCTYPE html>
<html>
<head>
<meta charset="UTF-8">
<title>Insert title here</title>
</head>
<body>
자료 입력</p>
<form action="/gptest/insert2" method="post">
<!-- 해킹방지 -->
{% csrf_token %}
	이름 : <input type="text" name="name">
	<input type="submit" value="확인">
</form>
</body>
</html>
list.html
<!DOCTYPE html>
<html>
<head>
<meta charset="UTF-8">
<title>Insert title here</title>
</head>
<body>
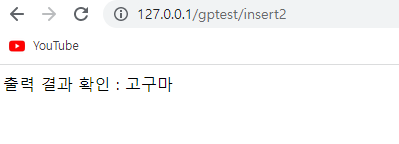
출력 결과 확인 : {{myname}}
</body>
</html>


'Django' 카테고리의 다른 글
| django5 - DB (0) | 2022.10.17 |
|---|---|
| django4 - session 예제(간이 쇼핑몰, 장바구니 기능) (0) | 2022.10.17 |
| django3 - session (0) | 2022.10.17 |
| django1 - static 폴더 (image, css, js) (0) | 2022.10.14 |
| Django 시작하기 - html 출력 및 forward (0) | 2022.10.14 |


